
And The Walls Came Tumbling Down
Not walls exactly, just one of the sides of the Driveway Border. When the snow melted this spring, it revealed that a bunch of the pavers used to create this border had fallen over.
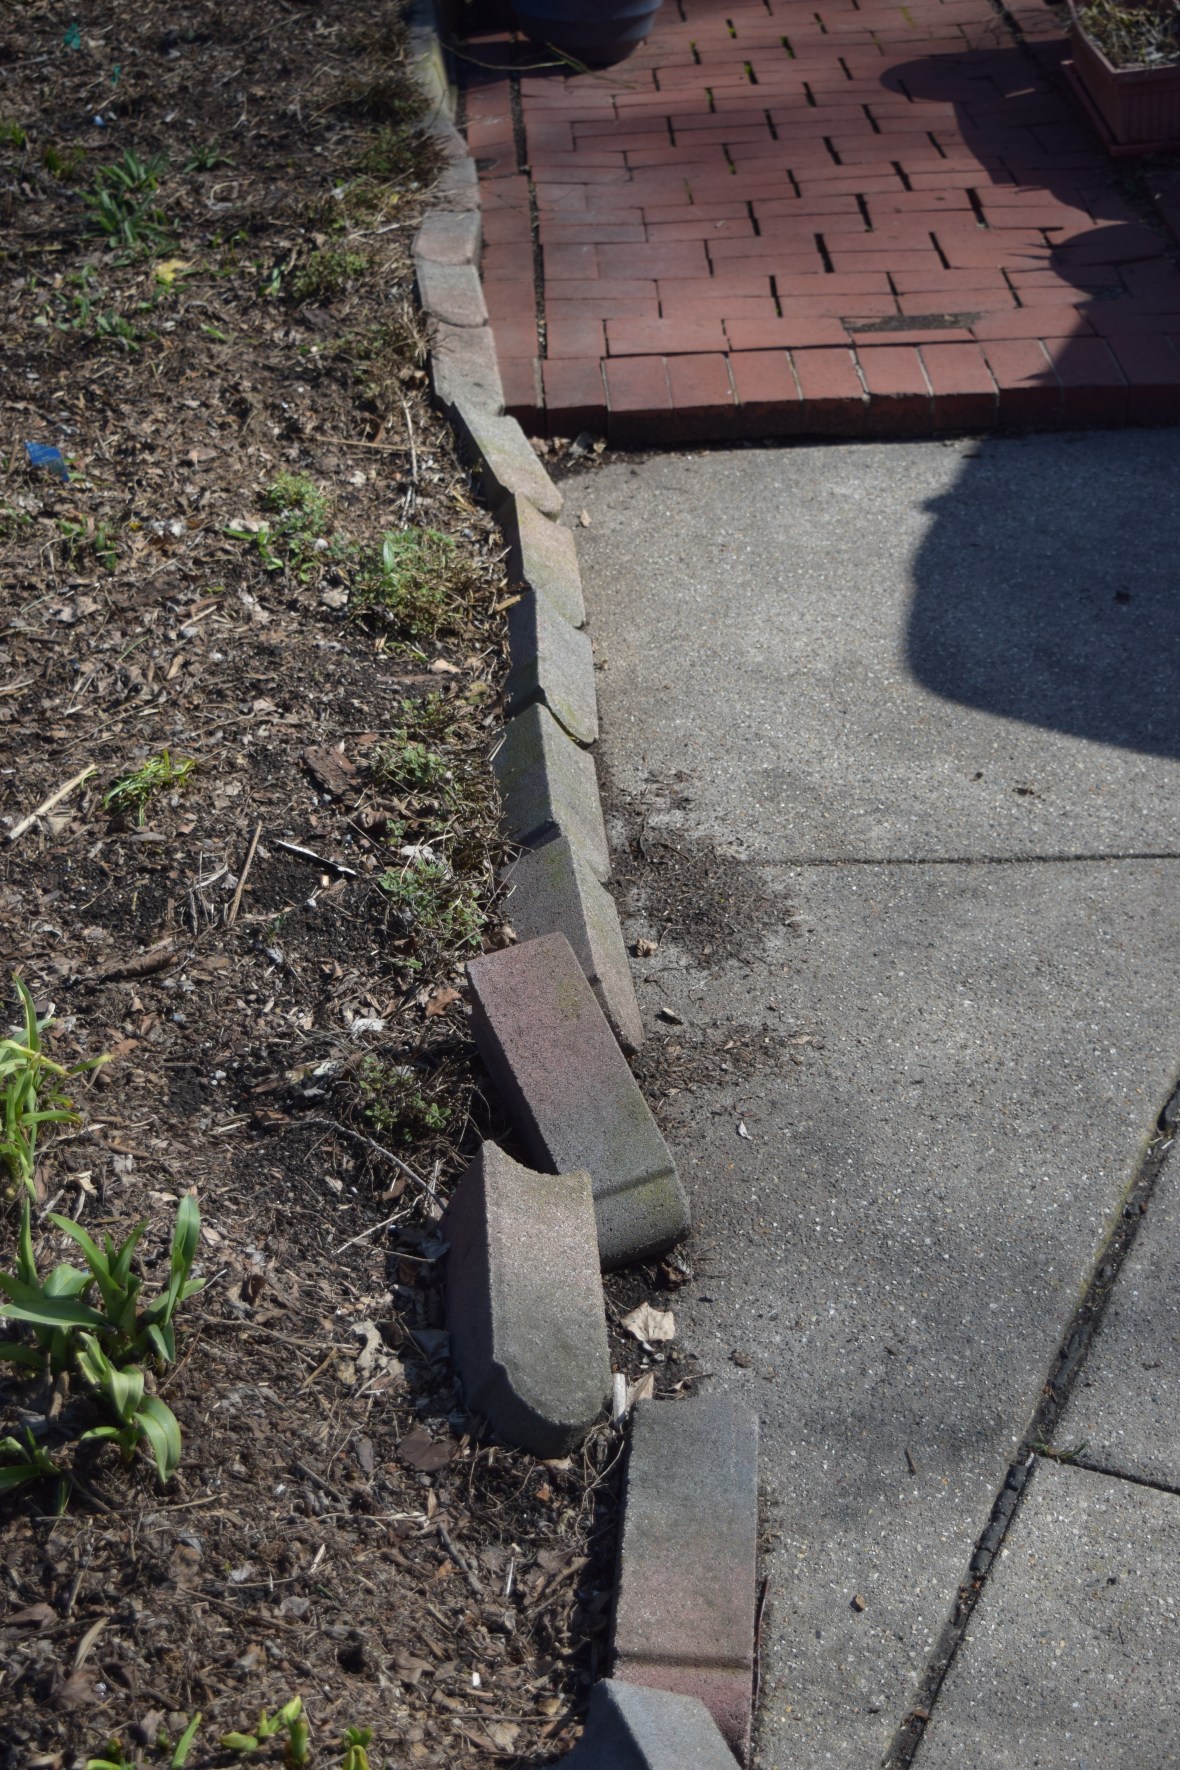
I made this raised border with two rows of pavers. The bottom row is dug a little more than halfway into the ground. The second row sits on top of the first, set in a fraction of an inch, or at least that was the intention. They are dry stacked, without any kind of mortar.
It’s not exactly Old World craftsmanship, but it generally works OK. Except that in places the plants and soil seem to be pushing out against the pavers, and parts of the top row just fall over now and then.
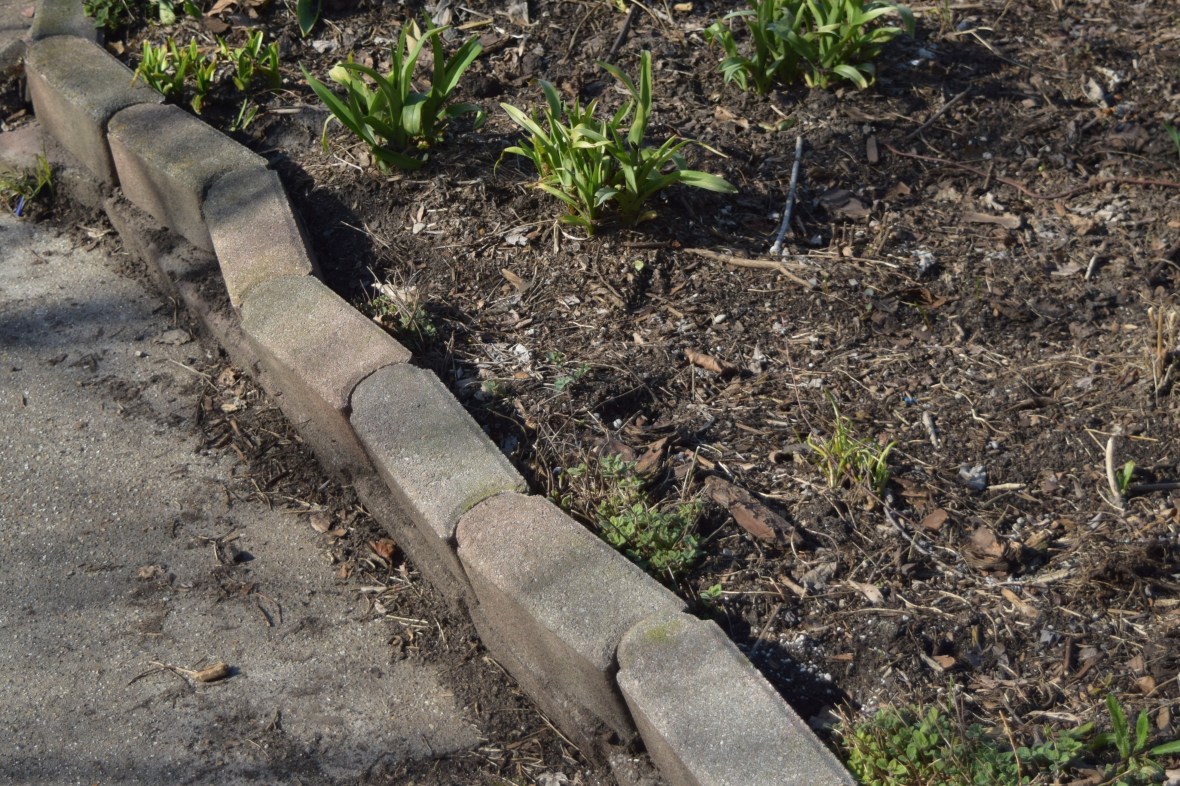
In response, I just clear out the soil and stack the second row back onto the first. I did this again last weekend. As you can see, though, these second row pavers are still at a somewhat gravity-defying angle. I do conduct regular maintenance by giving the pavers a few good kicks inward as I head out to work in the morning.

For most of the gardening season this defect is not a big deal because the edge of the raised bed is completely obscured by plants. For example, here’s Nepeta x faassenii ‘Kit Cat’ blooming during May of last year.
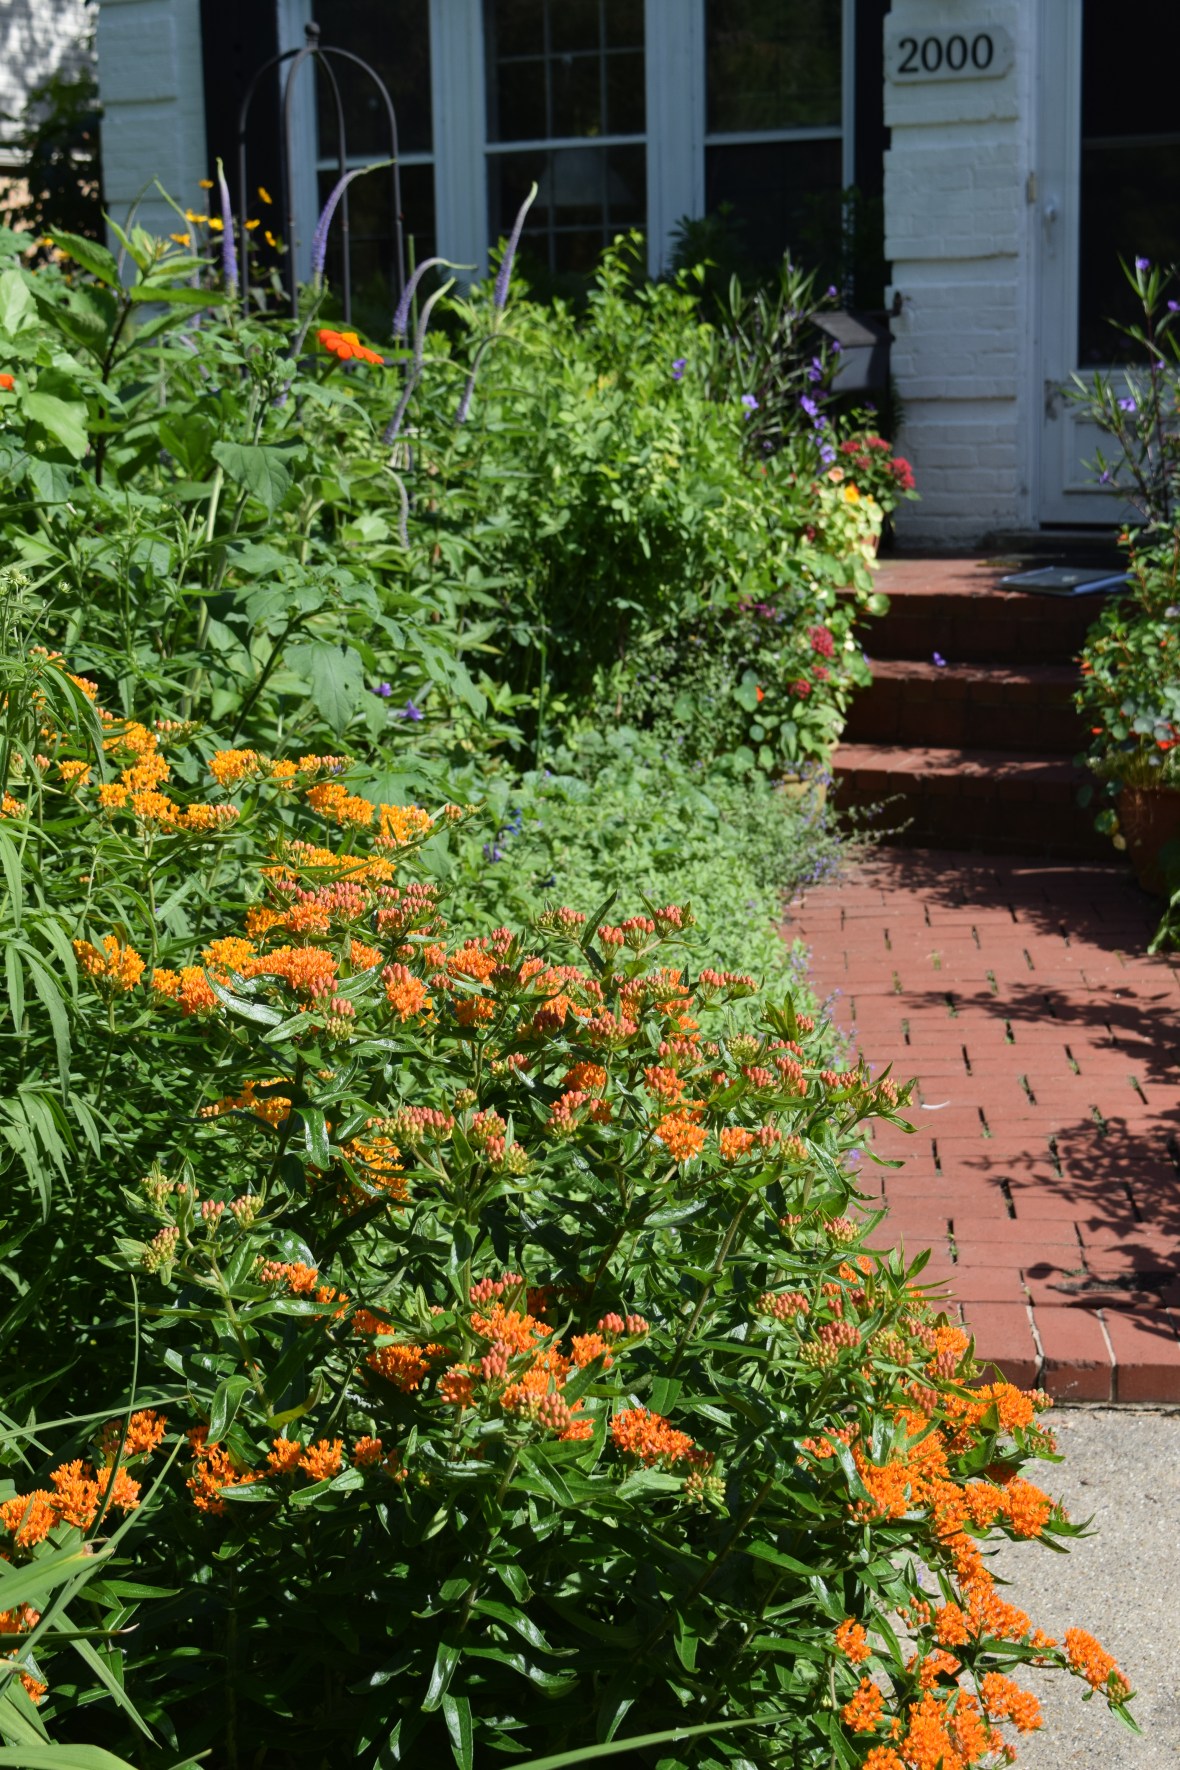
Butterflyweed (Asclepias tuberosa) helps out with its own flowers later in July.
Still, from early- to mid-spring the edges of this raised bed and its less-than-sturdy construction are laid bare. So I’m wondering: should I just keep putting pavers back as they fall over, or should I rebuild the low wall surrounding this raised bed – perhaps out of some other material – though I have no idea what that should be.
Any suggestions?


Keep up the ‘regular maintenance’ and don’t worry it will soon be hidden again
I may do just that.
I guess it all depends upon how much time and effort you want to put into it. You might need some heavier/larger material so it can’t be pushed out so easily, or you wait until the beautiful flowers cover it. Not much help here probably because I’m using a heating pad on my back still from the last shoveling incident so I wouldn’t want to tackle the project right now. 🙂
To be honest, I don’t want to put a lot of work into it – but I want the results!
That becomes a real ‘theme’ as we all age. 🙂
I giggled to myself when I read that you just give them the boot when you walk by. That would be my way of dealing with them. I do know how annoying it can be to see them acting like drunken sailors. You don’t even have dogs to blame for such a knock down. As Doris says, don’t worry be happy.
I’ll do my best.
Save your money and buy more plants!
Good thinking.
I’ve used railroad ties anchored into the ground with one inch rods. The freeze-thaw pops the rods up each year, but a good hit with a sledge hammer knocks them down again. Also releases any aggression, lol.
Railroad ties won’t work with my garden, I’m afraid. i do like the idea of the sledge hammer.
Amazing how Mother Earth heaves and pulls her bad self no matter how you try to rope and tie her. Blessed Easter and Happy Spring to All.
Same to you!
I’d just wait for the nepeta, butterflyweed, etc., to cover up the edging. Either way, it’s a “natural” look!
True, and I do like a natural look.
Just keep kicking.
Will do!
I can just picture you giving those pavers a kick as you walk by in the morning – that made me laugh 🙂 As others have said, it all depends on how much work you want to put in.
If you do decide that you want to replace the existing ones, you could do pavers that are narrower (horizontally) and longer (vertically) and sink them into the ground. Or you could do the angled brick thing, which looks rather nice: https://www.pinterest.com/pin/45106433742981876/
In both cases, you wouldn’t need the 2nd row, which seems to be the main issue.
Thanks for the suggestion. Might be more work than I am willing to commit to, but worth thinking about.
I would dig a little trench about half the height of the length of those pavers and then pop them in the trench vertically, so that way they push against the concrete.
I was going to suggest the same! Since you have a double row in place you’d likely have enough to stick them in vertically and hope they’d be a bit more sturdy. Otherwise I fully approved of the kick-as-you-go-by method!
Thanks – good suggestion.
I’ll think about that. Thanks for commenting.
Since the plants are just going to cover up any work you do on a wall, I think I would just use the same pavers. But I would suggest using rebar pounded into the ground around them to stabilize them a bit, so they don’t get quite so wonky in the winter. That might save you a little work.
The rebar is a good idea. I should buy one piece and see if that works.
I haven’t found anything that is a good permanent solution to pavers here. Our main problem is grass invasion around the pavers, and they sink into the heavy, wet clay soil here in mud season, eventually disappearing over time.
Grass invasion is a problem for me as well. I hate it when the grass grows into the crowns of the perennials.
Dig a trench big enough to stand bricks up on end in, and just deep enough to leave the amount of brick you want showing above the soil line. Put some mortar along the bottom of the bricks in the trench and when the mortar is dry rake the soil back into the trench. They won’t move because if they did they’d have to move as one.
Sounds like a good idea, though also a fair amount of work.
Yes, but you won’t have to do it every year.
I’m impressed with your spring and summer flowers that are so neatly, and colourfully covering the renegade bricks…perhaps just leave the bricks and admire the shrubs and flowers.
The option that appeals best to the lazy gardener in me.
Lots of good suggestions here, but wouldn’t you miss the opportunity to give those wayward pavers a good kick now and then?
Very good point.
Avoid stoop labor at all costs.
Very wise words.
Being lazy, I’d just leave it the way it is. If you didn’t have to rebuild the wall every now and then, you might forget the story. Now “Joshua fit the battle of Jericho” is stuck in my head.
Catchy tune, isn’t it?
I stand with your other commenters. More fun to plant. The Nepeta is beautiful. After many years my Nepeta disappeared this year so I added a couple of new ones. Makes a great edging.
Sorry your Nepeta disappeared. It seems pretty long-lived in my garden. Worth replanting, though.
I love the kick method! At my age, I count the hours I can be in the garden doing the fun stuff, so I’d explore a deep paver that you can sink in the ground that would have more of a likely outcome of not needing kicks and hours of maintenance. I think I have seen those deep pavers at the big box stores. I recall they are cement in appearance, and maybe that is not to your liking, but soon the plants will be spilling over anyway. ANd then when they are cut back, comes the snow.
I think I would first see if I can use the pavers I already have, but next time I am Home Depot I will see what they have in stock.
I used what I call castle block for walls that need to actively retain a bed. It has a lip, so they can’t slip out. The ones I originally used (20 years ago) were solid; now they are hallow, so lighter to handle. Their one drawback is they tend to be a bit deep. A plus is you can build curves.
Hmm. Not sure I have seen that. Is it the sort of thing they have at the Home Depot?
Used to have the same problem with my scalloped edging. Once a year I’d need to set it straight. I vote for realigning them and then let the plants grow over them. Thought your kick comment was hilarious.
That’s what I’ve done, at least for now.
Keep on kicking, my friend! 🙂
As long as I can!
Haven’t read all the other comments, so maybe someone has mentioned this. You could put gravel in right behind the wall which would slow the pressure from the dirt. Also if you redid the whole wall put weed barrier and gravel right behind the pavers. I don’t think there is another material that will be better. We have a lot of walls in our garden and sooner or later they start moving!
That sounds like a good idea, thanks!
Your regular maintenance has me laughing, a little like how I manage weeds coming through the flags, I scuff a few each day. Kit cat is lovely.xxx
I turn the weed whacker on the weeds coming up through the pavers.
The former owners of the MoneyPit built raised borders by cementing flagstones together, stacked about 5″-6″ high. Every winter more of the top ones disconnect themselves, exposing a big blob of what looks like a flattened hockey puck of dry white cement. Between the soil, the roots, and the “weathering”, I’m surprised any of the sections are even remotely intact, frankly! (now I’ve said that, one will probably tumble down in the next heavy rain…)
Sounds like it probably looks nice, though.
Hello Jason, could you stop the pavers from falling forward by pinning them back using short lengths of rebar? It might look ugly when exposed but should be covered in summer, though you might need too many rods as each paver would need two to hold it back properly. The “kick” method might be less hassle!
The rebar is a possibility. The drawback to kicking is that you have to keep doing it forever.
Lovely blog, in the U.K. We use old timber supported with pegs or stakes hammered in behind to support them. The timber needs to be about 1″ thick by 4 or 6 inches high. This will last for years and the plants look great tumbling over in the summer and it looks tidy enough in the winter.
I like old timbers, but my borders are too irregularly shaped for me to use them.