About 2 weeks ago on a mild February Saturday, I decided it was time to prune our ‘Donald Wyman’ crabapple out front. Some people say crabapples should be pruned right after they bloom in order to minimize the impact on flowering the following year. Even so, I went with February so I could see what I was doing.
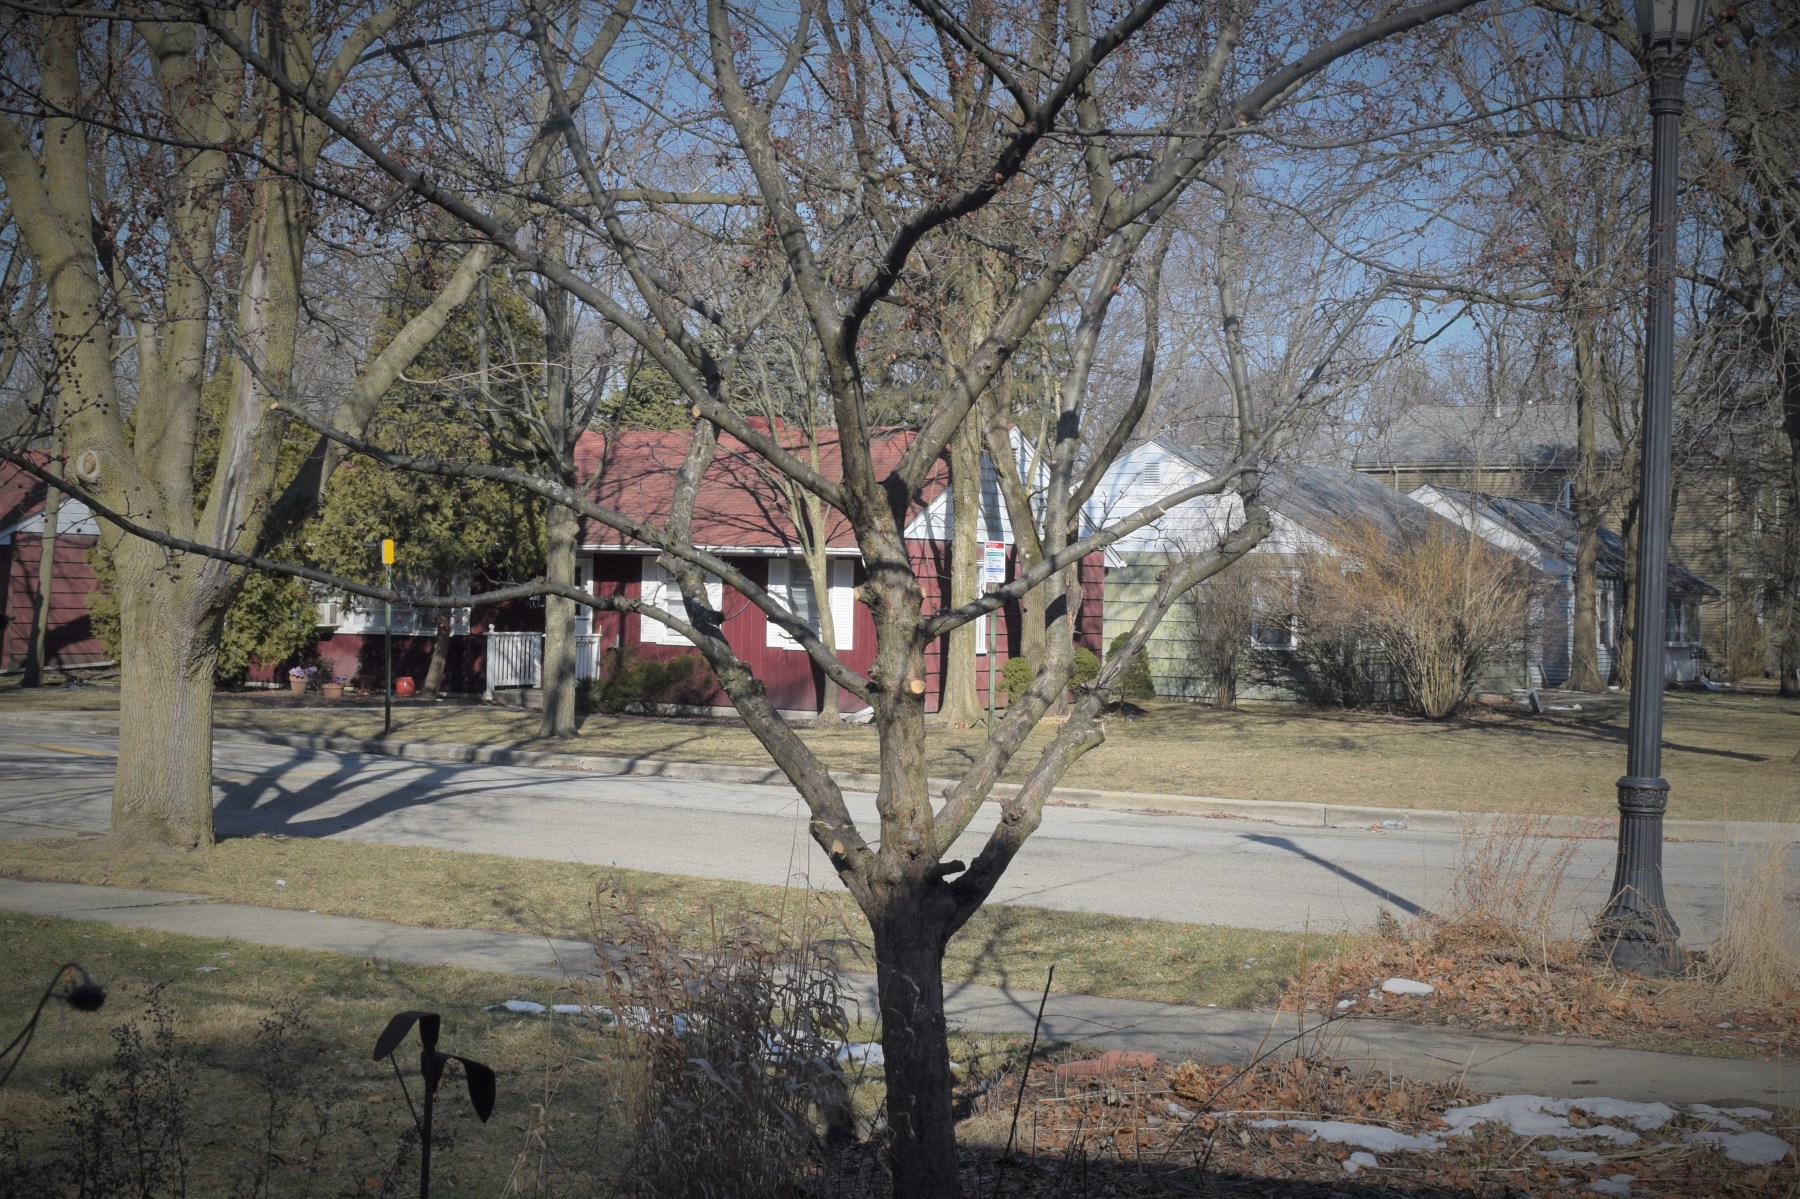
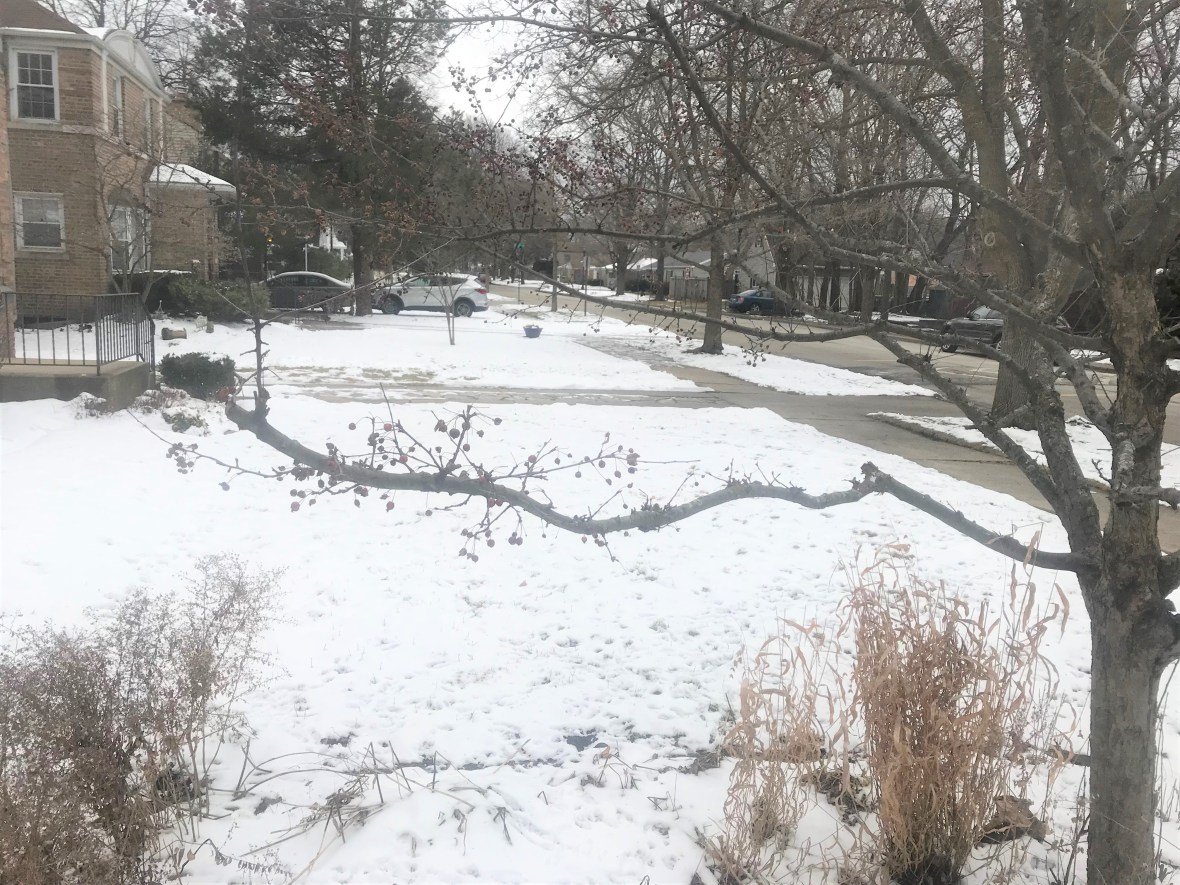
It was mild, like I said, but very overcast. I tried to take some before pictures but they’re not very sharp. What I hoped the pictures would demonstrate is that in addition to removing dead/diseased/damaged/crossing branches, I had a challenge in terms of how to shape the tree.
Now, generally, I like either a nice rounded or vase-shaped tree. Neither was really an option here. For one thing, there were branches growing too low over the driveway that were a nuisance – especially when loaded down with fruit and/or rain. The same thing was happening on the other side of the tree, where our neighbor Matt was getting slapped in the face with crabapples every time he tried to mow his lawn.
Then there were branches that stuck out awkwardly like an extra arm. And I don’t know if this is a thing particularly with ‘Donald Wyman’ or what – but it never seems to reach its mature size. Instead, it just keeps growing, the branches stretching further and further out, to where they really aren’t wanted.
In general I try to keep my pruning to a minimum, because Judy hates it when I remove branches. But this time I was more aggressive, removing awkwardly positioned stuff like the one above.
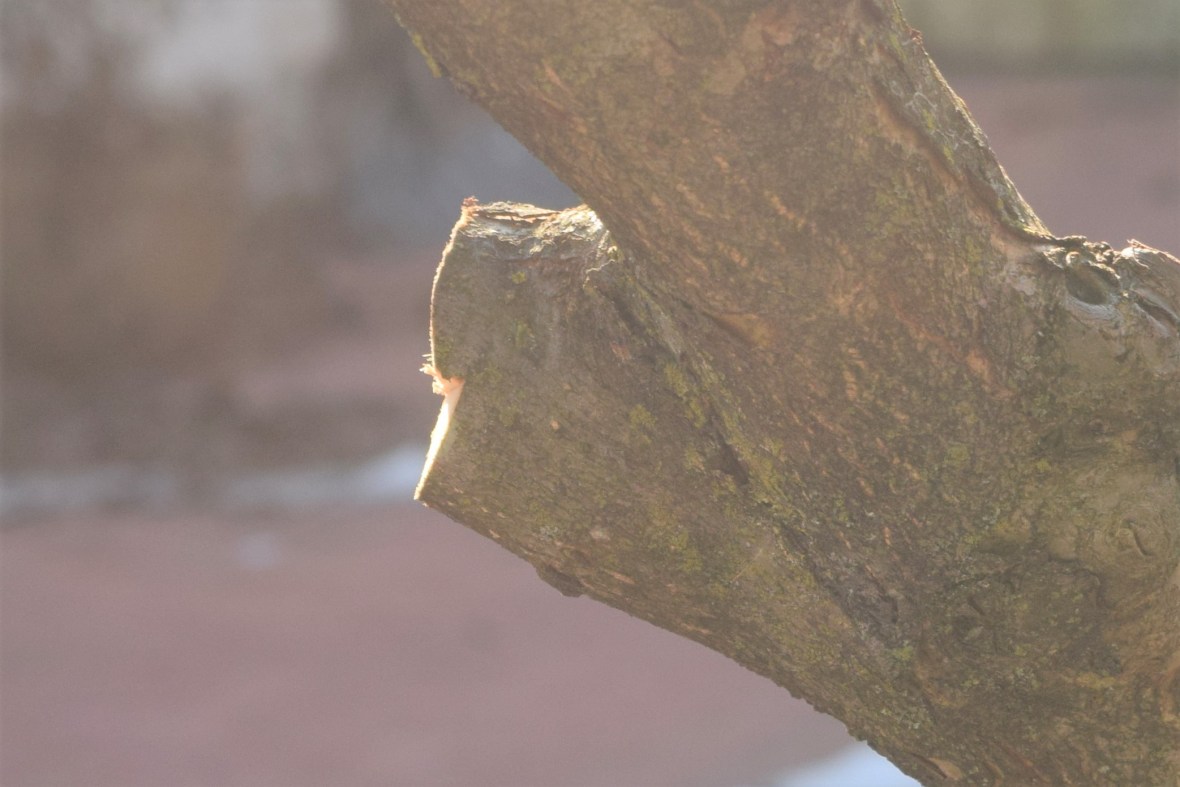
So do you know about how you should remove branches by making 2 cuts, one from above and one from below? You probably do, but in case you don’t, let me provide a little PSA here.
If you just make one cut from the top, the branch is likely to crack before you’re done, damaging the trunk and taking a long strip of bark with it. To avoid this, you start by cutting about halfway through from below. Then you make your second cut from the top about an inch further out. You can kinda see how I did this rather inexpertly in the photo above.
If you’ve got a really big branch, you probably need to take it down in stages. Here’s a guide to pruning branches from Fiskars.
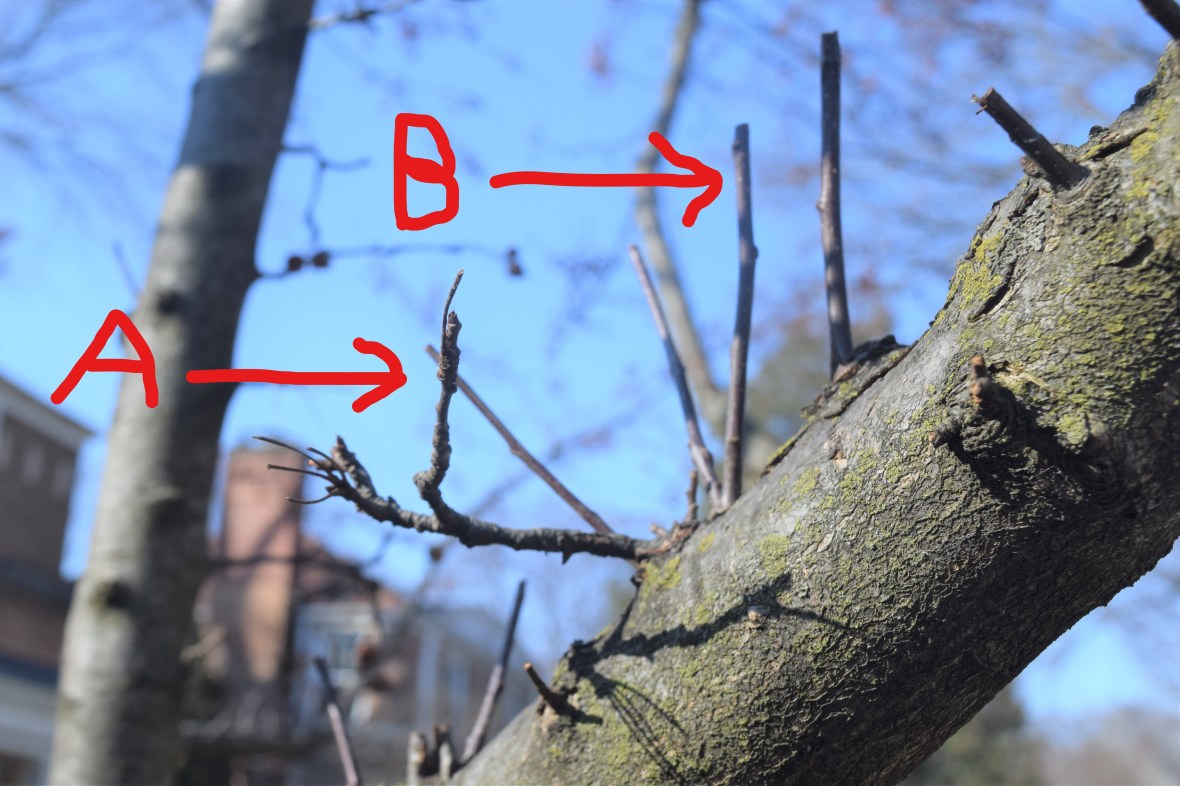
And do you know about water sprouts, suckers, and spurs? Oh my! OK, so suckers grow from the base of the tree. Grafted trees tend to have lots of suckers. Just cut those suckers down at ground level.
Spurs are gnarly little flower- and fruit-bearing stems. They stay pretty small, so leave them alone. Water sprouts are smooth straight shoots that grow out of branches. They will turn into full-size branches themselves if you let them. I used to cut them off at the base. However, turns out if you cut them back so they are a few inches long, then they may bear flowers and fruit.
I learned this information from Tony Tomeo, who is a California arborist, horticulturist, and garden writer. Hey Tony – I apologize in advance for anything I got wrong.

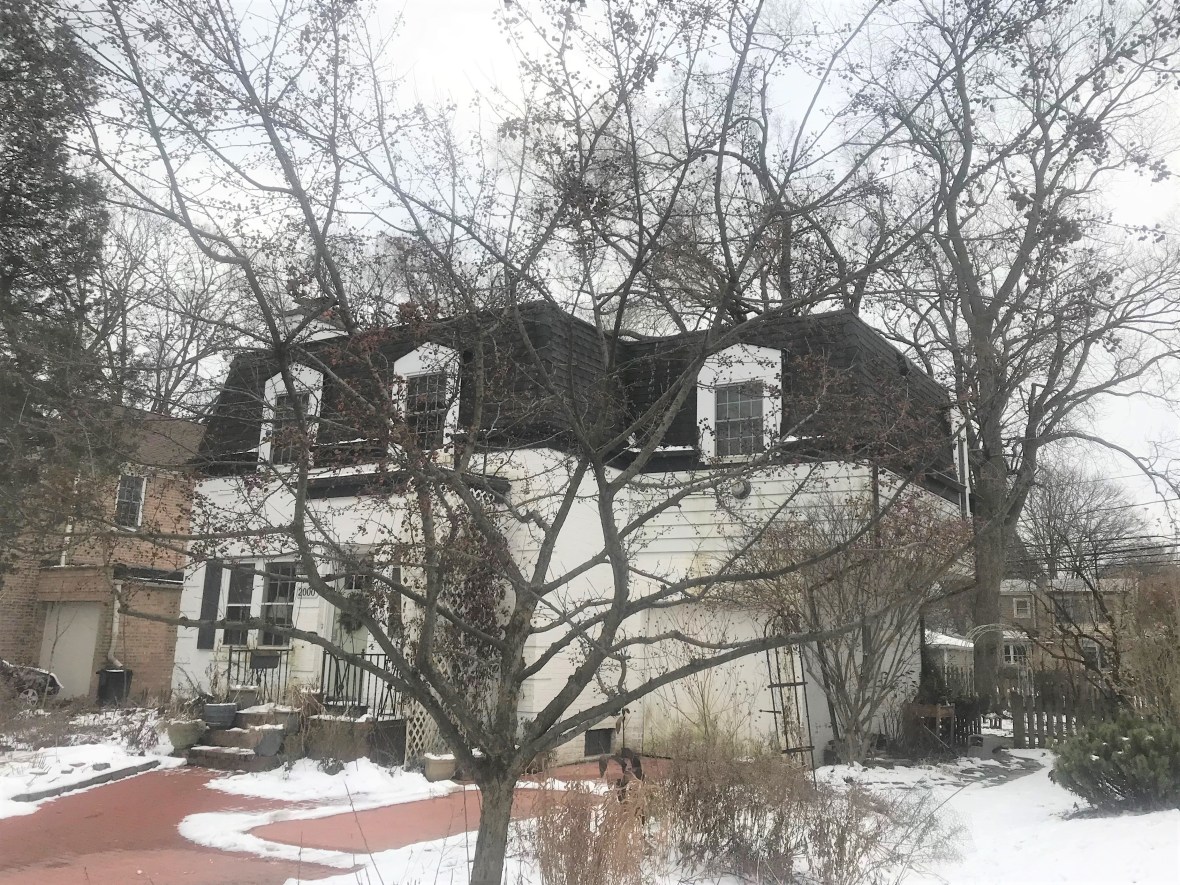
So anyhow, here’s what ‘Donald Wyman’ looked like after I was done. Not exactly vase-like, unless its a vase made by a particularly clumsy potter.

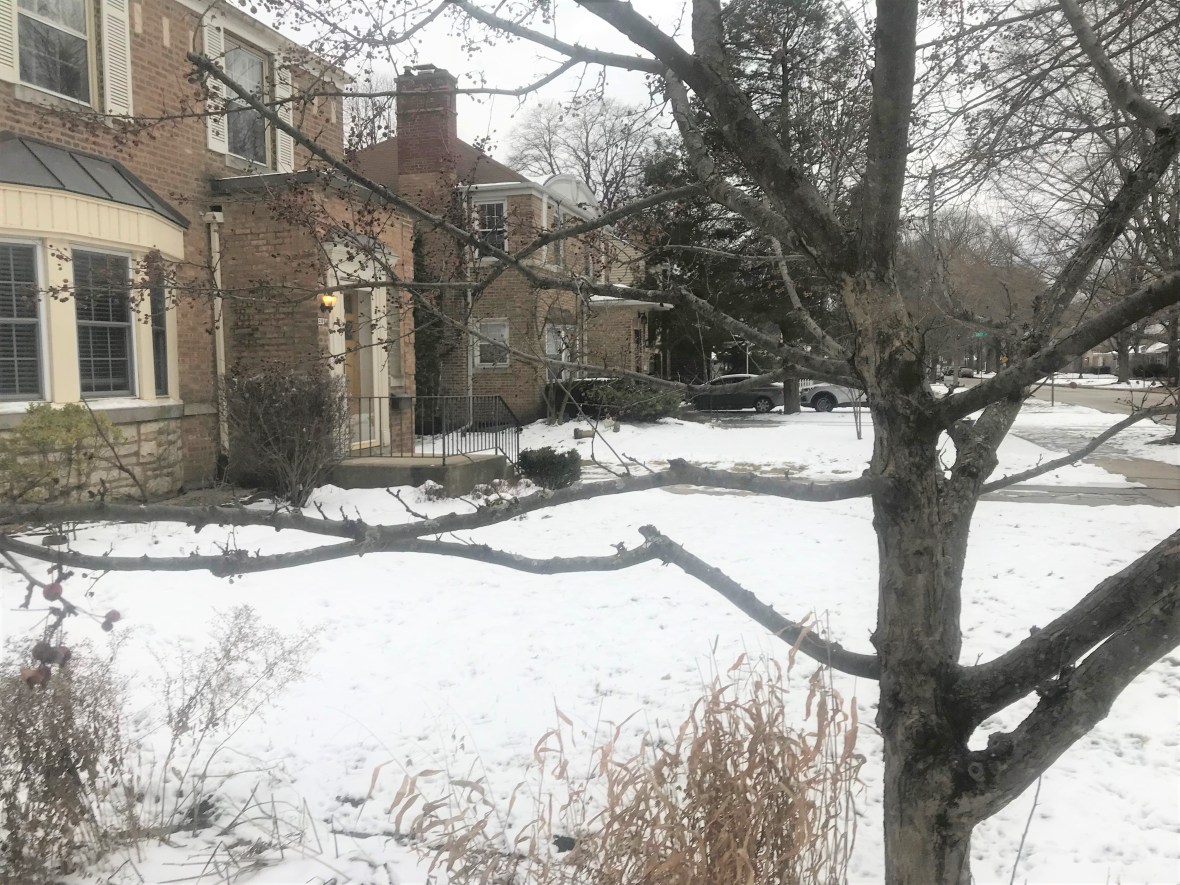
Another view. Please note that I’m sharing with you my own effort to prune this particular crabapple. It’s not a comprehensive or expert account of how to prune small trees. Do you have any pruning of woody plants on your agenda for the next few weeks? If so, be careful – and enjoy!


Very sad. Poor tree. It wasn’t hurting anybody, just minding its own business.
It will be happy with the pruning when growth resumes.
I love pruning! You did a great job getting it into shape and less disruptive form! We did some pruning on our apple trees just this weekend- now is a great time to do it!
I enjoy it, also. Except I get anxiety disorder over whether or not to cut this or that branch.
I totally get that!!!! I try to zone out and just envision what I want the tree to look like and how the branches are growing. After all, you’re not going to kill an established tree by pruning!
That tree was not as mixed up as I thought it was. I know how they put out those awkward limbs though. They are normally more difficult, after they become integral parts of the canopy. I probably mentioned earlier that, although it is correct that flowering crabapples should be pruned after bloom, I did mine prior to bloom just because it was easier to work with. (Besides, mine was such a nasty thicket that there was still plenty on the outer canopy to bloom without all the mess inside.) My only concern is that stub left after making the two cuts to remove the limb. Was the stub removed with a third finish cut? I don’t mean to ask an inane question, but there was no mention of the third cut . . . and there seems to be a stub to the right of the lower right limb in the last picture. Such a stub would eventually be harmless on a small tree like this, but for larger trees, would allow decay to develop in the wound before it is compartmentalized. Removing stubs is more visually appealing and promotes more efficient compartmentalization. Also, stubs have a way of developing watersprouts.
I actually haven’t removed those 2 stubs, but I will now.
Wow, good for you! I wouldn’t even attempt to prune our large crabapples. I think we need to hire someone to do it, though, because they’re becoming overgrown. Gotta figure out what to do with the redbud, too. 😉
We used t have a Redbud, but it’s long gone.
I think you did a nice job. Someone once said that the key is to visualize how you want the end result to look, and then cut accordingly. I tend to work slowly, deliberating each branch. Others – like my friend William, who I hired to help me last autumn – are more decisive, and go straight for larger cuts. It’s amazing how much better the trees and shrubs he worked on look now, compared to before. I don’t have that kind of confidence yet, nor do I know if I ever will. Pruning truly is an art form.
It’s not easy because you can’t undo a cut and put the branch back.
Exactly.
Congratulations! I think the clumsy-potter look is exactly right for a crabapple!
You could be right.
I think your tree will be happy with its pruning. So will you and your neighbor.I always prune so I don’t hit my head so if you are taller than me you might conk your head in some areas if you aren’t careful. I certainly have some pruning to do. We have three Hawthorn trees that need some thinning. They are old and not producing many fruits. I think one problem is that they haven’t been thinned out in a while. They are so tall they are difficult to get to.
I have never pruned a Hawthorne. They are beautiful trees.
The 2 cut method should actually be a 3 cut method on branches larger than 2 inches in diameter.. You cut from the bottom about a foot or so away from the base of the limb or branch to be removed. Then you cut from the top of the branch further out from the bottom cut a few inches. This removes the branch without tearing the bark. With the branch removed you now have a stub that can be cleanly removed at the”collar.” ( that swelling at the base of the branch where it grows from the trunk) The fourth picture shows it very well. You should remove that bit of stub that shows there. This helps the tree seal over the scar.
Prune those low branches while small. Leave no stubs. Counter intuitively, where you cut is where you will get growth. Good information at the Arborist Associations websites.
I think you did a good job overall. The shape looks good.
All makes sense except the thing about where you cut is where you’ll get growth. How’s that again?
The main thing is to let plenty of light and air circulation into the center of the tree. I also always cut the longer branches back by about a third. Cut just above an outward facing bud.
The tree doesn’t look bad but I think I’d do even more to the longer branches.
I tend to cut branches off at the base.
It will be interesting to see how things develop as the season goes on. Even with my plants, I used to hate to prune, but I discovered that, especially with things like Hawaiian schefflera in pots, I couldn’t keep repotting as they grew. Too much size, dirt, and weight. Keeping them pruned back keeps things in better order.
I kind of enjoy pruning, though I get nervous about making a mistake.
Well done, it will look much better for it. You have encouraged me to get out and do mine. It has lots of wide spreading lower branches.
I always tend to limb up the lower branches.
It certainly looks a lot smarter. You remind me that mine needs sorting out.xxx
Something always does.
Hello Jason, I think you did the best you could with the shape you had. As the tree branches out at such a low height, you can’t raise the canopy any further and tip pruning would just look fussy. The other take-away I got from this is that you have a very different definition of “mild” than I do. “Mild” doesn’t involve snow on the ground here 🙂
Well, everything is relative.
Hi Jason … I found this really interesting especially doing the 2 stage cut of a large branch.
We just planted a young crabapple last year (Malus “Profusion”) .. but it has two top leaders, so I have to prune out one this Spring .. soon … I watched You Tube videos and that was quite helpful too .. I can’t wait for this little gem to mature and really put on a show with it’s flowers.
Thanks for the tips !
You may notice that a couple of people added correctly that for branches that are 2″ or larger it’s actually a three step process.
It looks great! I have a tree I have pollarded, and I have fun every year shaping it.
I’m kind of intimidated by the thought of pollarding.
Well, it was a tree that had been given to me from the Arbor Day Foundation, and after being in my garden for a few years it was doing nothing. No flowers or fruit, no fall color. No interesting shape. So I figured I had nothing to lose and lopped off the top. Suddenly, it was interesting! It was one of a pair, and the other one I tried to coppice but when the branches came back up they were unruly so I’m just removing that.